


Kissing Diamonds Quilt Tutorial
After I posted my Verdant quilt a few weeks ago I had a few requests for a tutorial. Since this is not all that difficult to put together I thought I would put together a quick tutorial.
 I thought I'd change the name of the quilt for the tutorial since Verdant referred to all of the green in my quilt and you can use whichever fabrics you would like. My daughter is in kindergarten and her teacher is always reminding them not to have "kissing words" when they write, which means that there words touch. Since the edges of each color of diamond touch I thought that would be a fun name :)
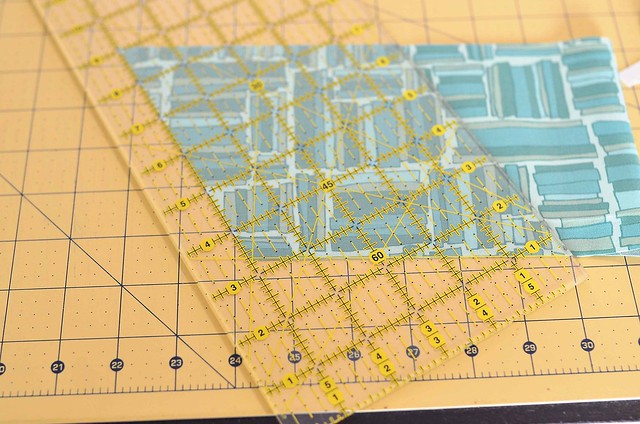
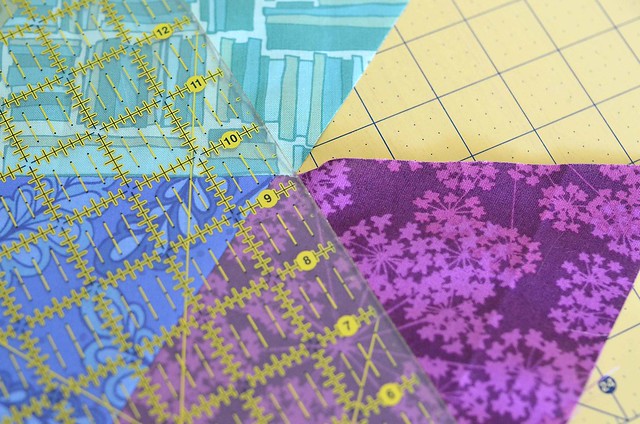
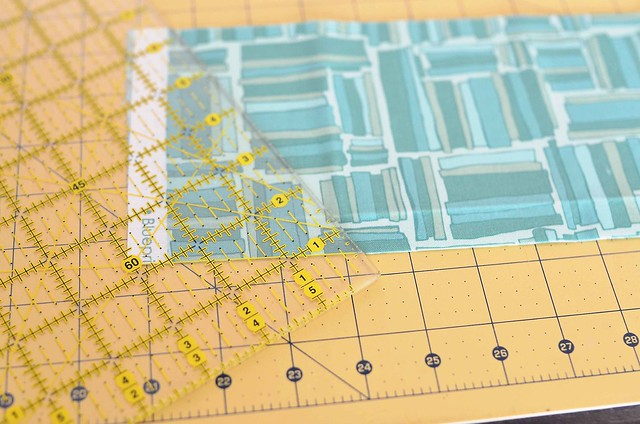 Now line up the 60 degree mark with the bottom of the fabric again, but line up the left edge with the 5" mark on the ruler. Cut.


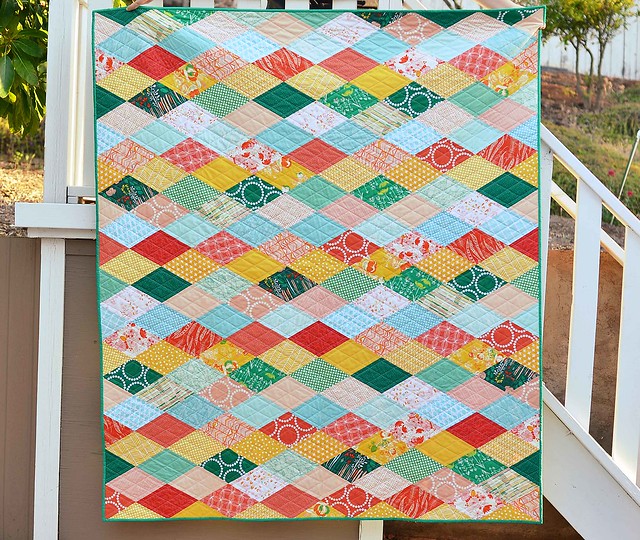
Cut the diamonds. You will need 217 total diamonds. For my quilt I used 5 different colors: 45 green, 45 peach, 37 blue, 46 orange, and 44 yellow. Some rows need 8 diamonds and some need 7 so depending on your layout you may need a couple more or less than that number.
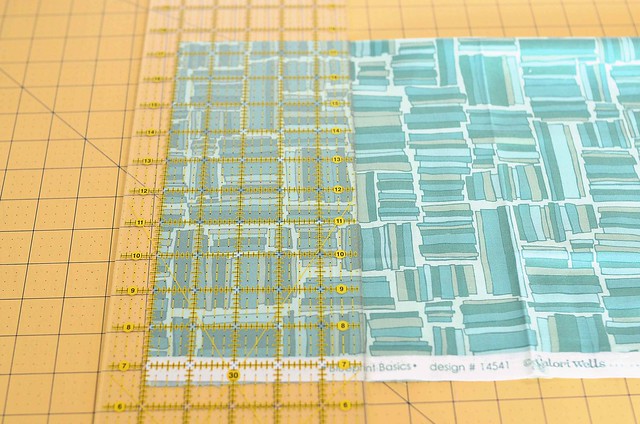
To cut the diamonds cut a strip of fabric 5" x WOF, leaving the fabric folded. I used a fat quarter here but you could also use a wider cut.
Now turn the fabric sideways and line up the 60 degree mark on your ruler with the bottom of the fabric and trim off the edge.
If you are cutting from a fat quarter you can get 2 diamonds per strip and if you are using the full width of the fabric you can get 4 diamonds. Keep cutting until you have the desired number of diamonds.
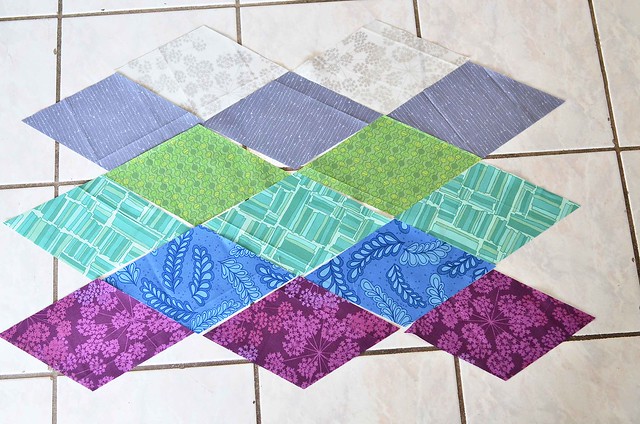
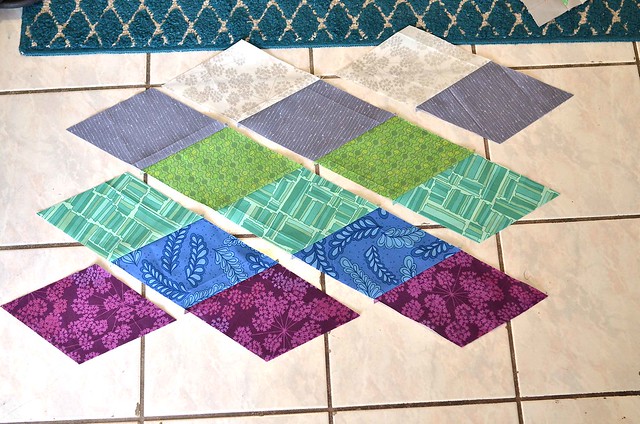
Once you have them cut, choose a layout for your quilt. I am going to make a much smaller version (using Valori Wells Blueprint Basics) to illustrate.
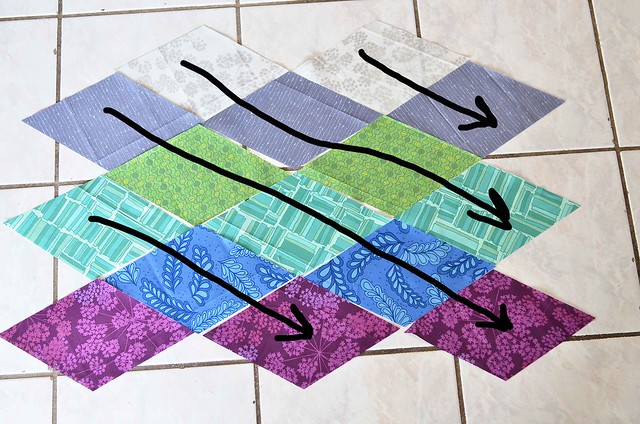
We are going to piece them together into diagonal rows like in the following photo. Forgive my crudely drawn arrows!
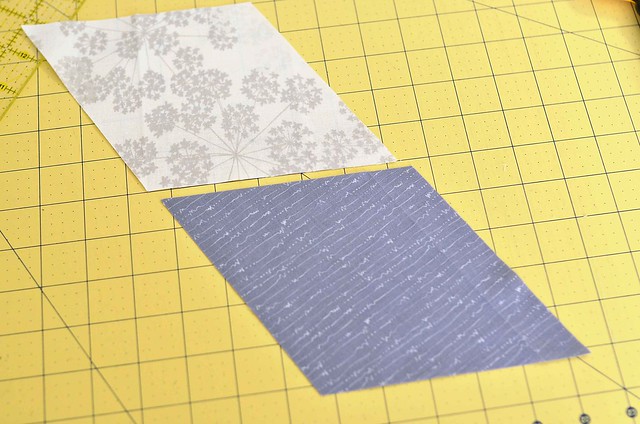
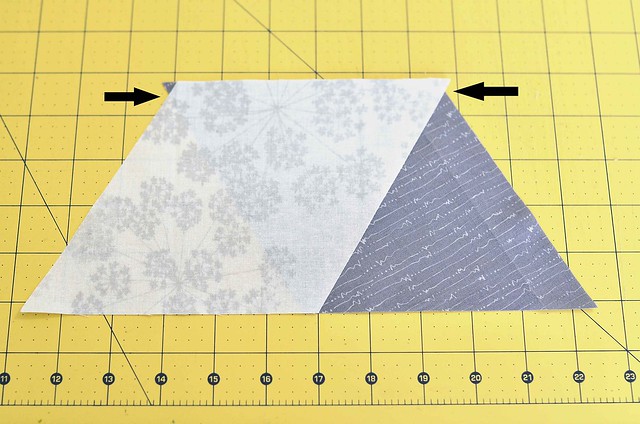
To piece together the diamonds take two of the diamonds from a diagonal row.
And fold the top diamond down onto the bottom diamond so they are right sides together. Instead of lining up the corners like you do with squares, you want the edges of the diamonds to cross 1/4" from the top. If it helps you can measure 1/4" down to make sure you are getting it right, but after you have done a few you should just be able to eyeball it. Be careful not to stretch the fabric. I like to use a pin at each edge and 2 in the middle just to be safe.
Press your seams open. Now repeat until you have completed the row. You can clip the little dog ears if you prefer to, but I left mine and didn't feel like it added much bulk at all.
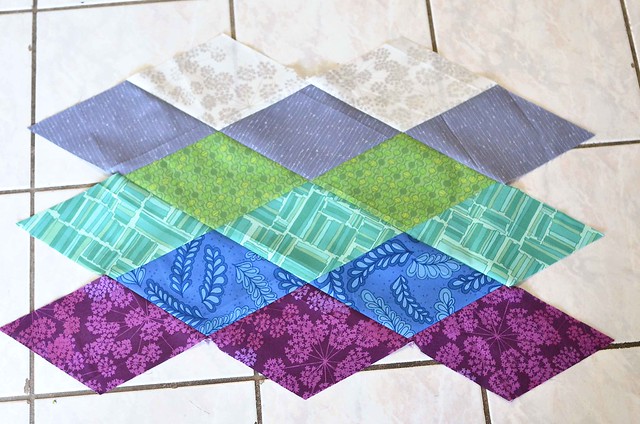
Once you have completed the rows they should look something like this (but of course bigger).
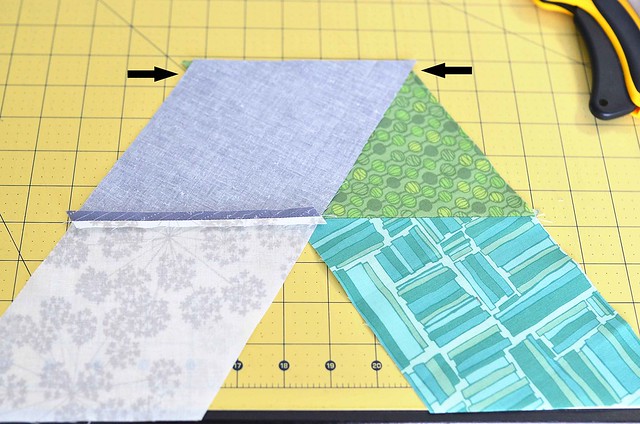
Piecing together the rows is slightly trickier, but still not that hard, because you can't see where you are lining up the seams. Elizabeth Hartman recently did a really great tutorial about piecing diamonds if you want some additional help. You still want the seams to cross 1/4" from the top but you just have to feel around for where they cross. I would definitely recommend pinning at each seam intersection; the fabric here can stretch and we don't want that to happen!
Piece the rows until you have a finished quilt top.
Now you are going to trim the edges. Just line your ruler up 1/4" to the right of where the diamonds meet on the end of your quilt. I'm not sure if that makes sense so hopefully this photo will help.
And you have a finished quilt top!
I hope that is helpful for those of you that requested a tutorial. Please let me know if you have any questions and I will do my best to answer them!
Bernadette on
What size is the Kissing diamonds quilt, when it’s finished?
Will it be large enough for a queen size bed?
I appreciate the information.
Peace & blessings,
Bernadette
Amy on
How big is this when finished?
Pat on
I’ve been asked to make some harlequin quilts for Project Linus. While your pattern runs horizontal, I’d like mine to be vertical (using black, green, purple and gold solids). Other than just changing the orientation of the sewn strips, are there any other things/gotchas I need to be aware of? Thanks!