


A Scrappy Melody Quilt + Some Luxe Cuddle Tips
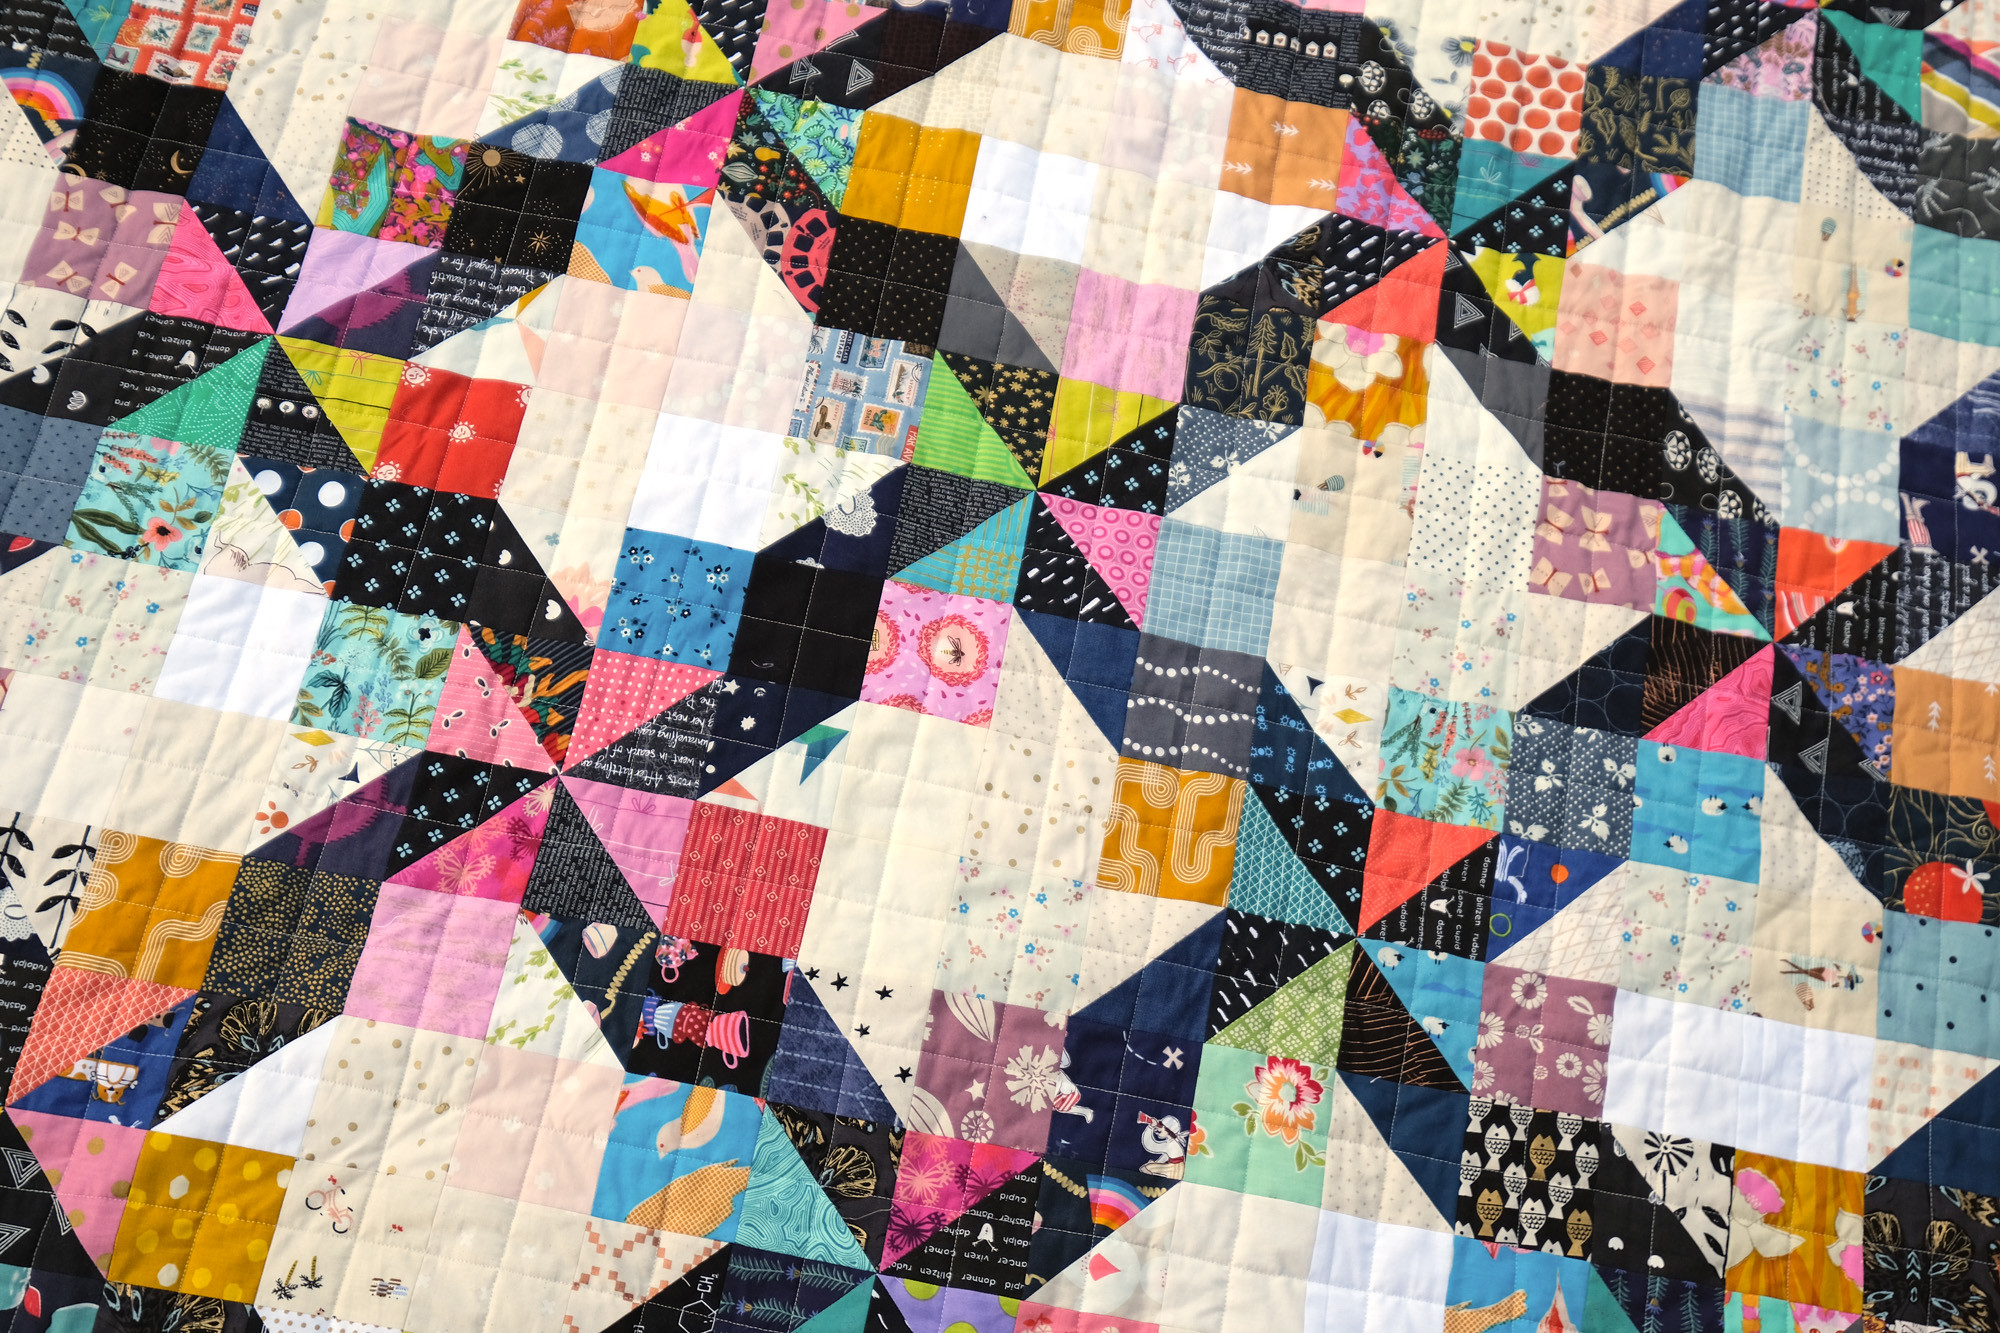
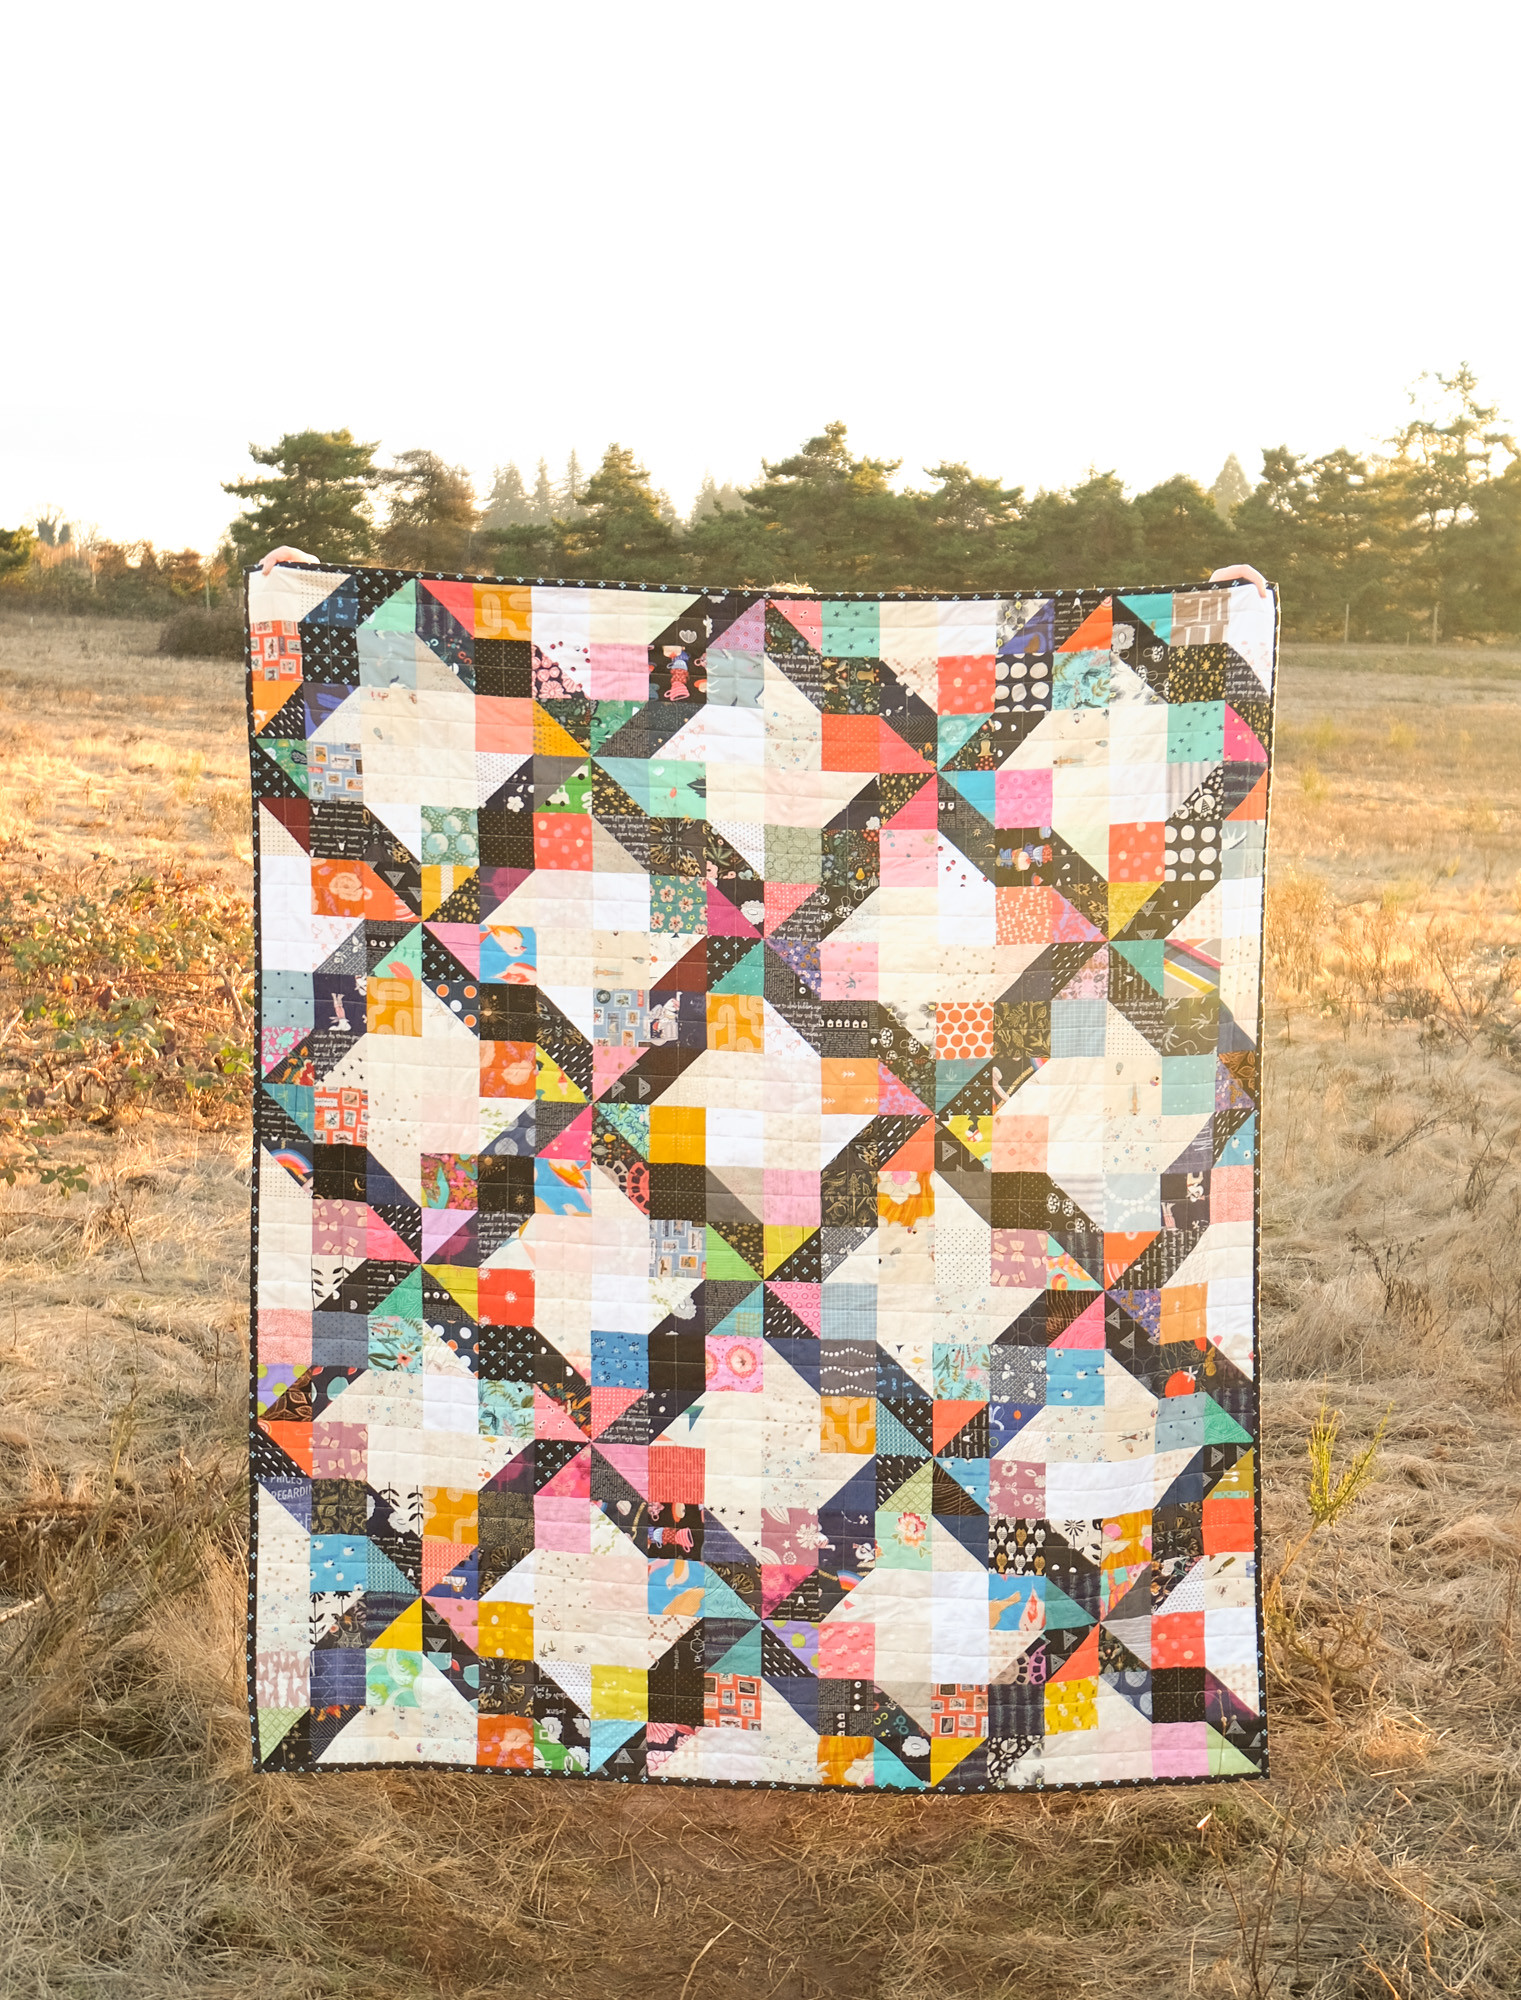
As a personal challenge to myself (and out of necessity since my scrap bins are overflowing) I have been trying to make a scrappy version of most of my patterns. For the Melody Quilt Pattern, I knew that I would need to do something to differentiate the scraps so that the pattern didn't get lost — I couldn't just use colored scraps + white scraps because I needed a 3rd category.
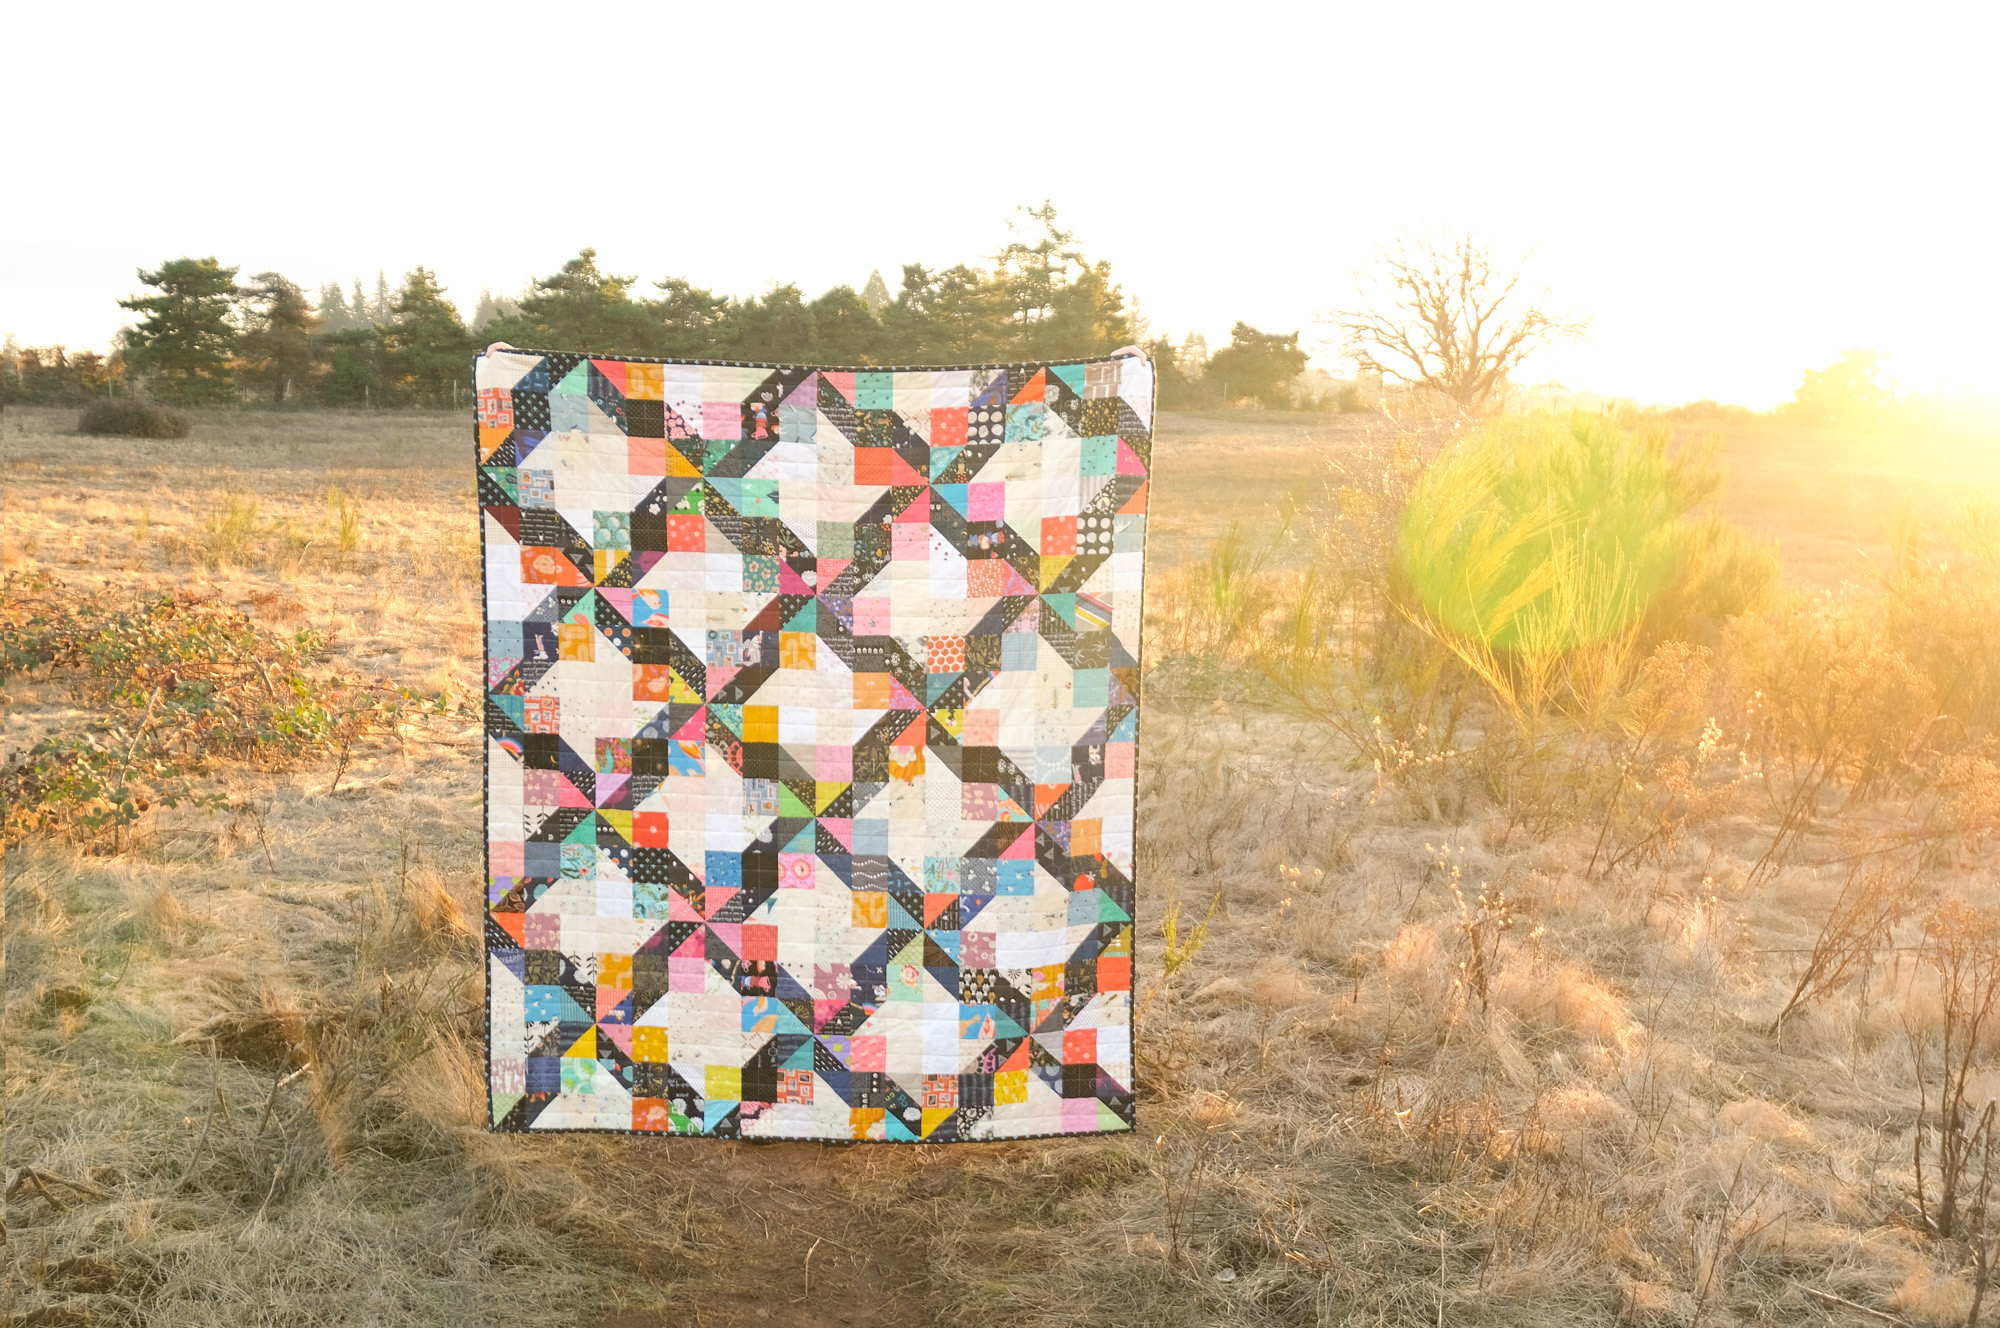
If you have used my Plaid-ish quilt tutorial, you know I like to use value so this seemed like a fun way to go with this pattern. I would use darker value scraps for the A Fabrics, medium value scraps for the B scraps, and light value scraps for the background fabric.
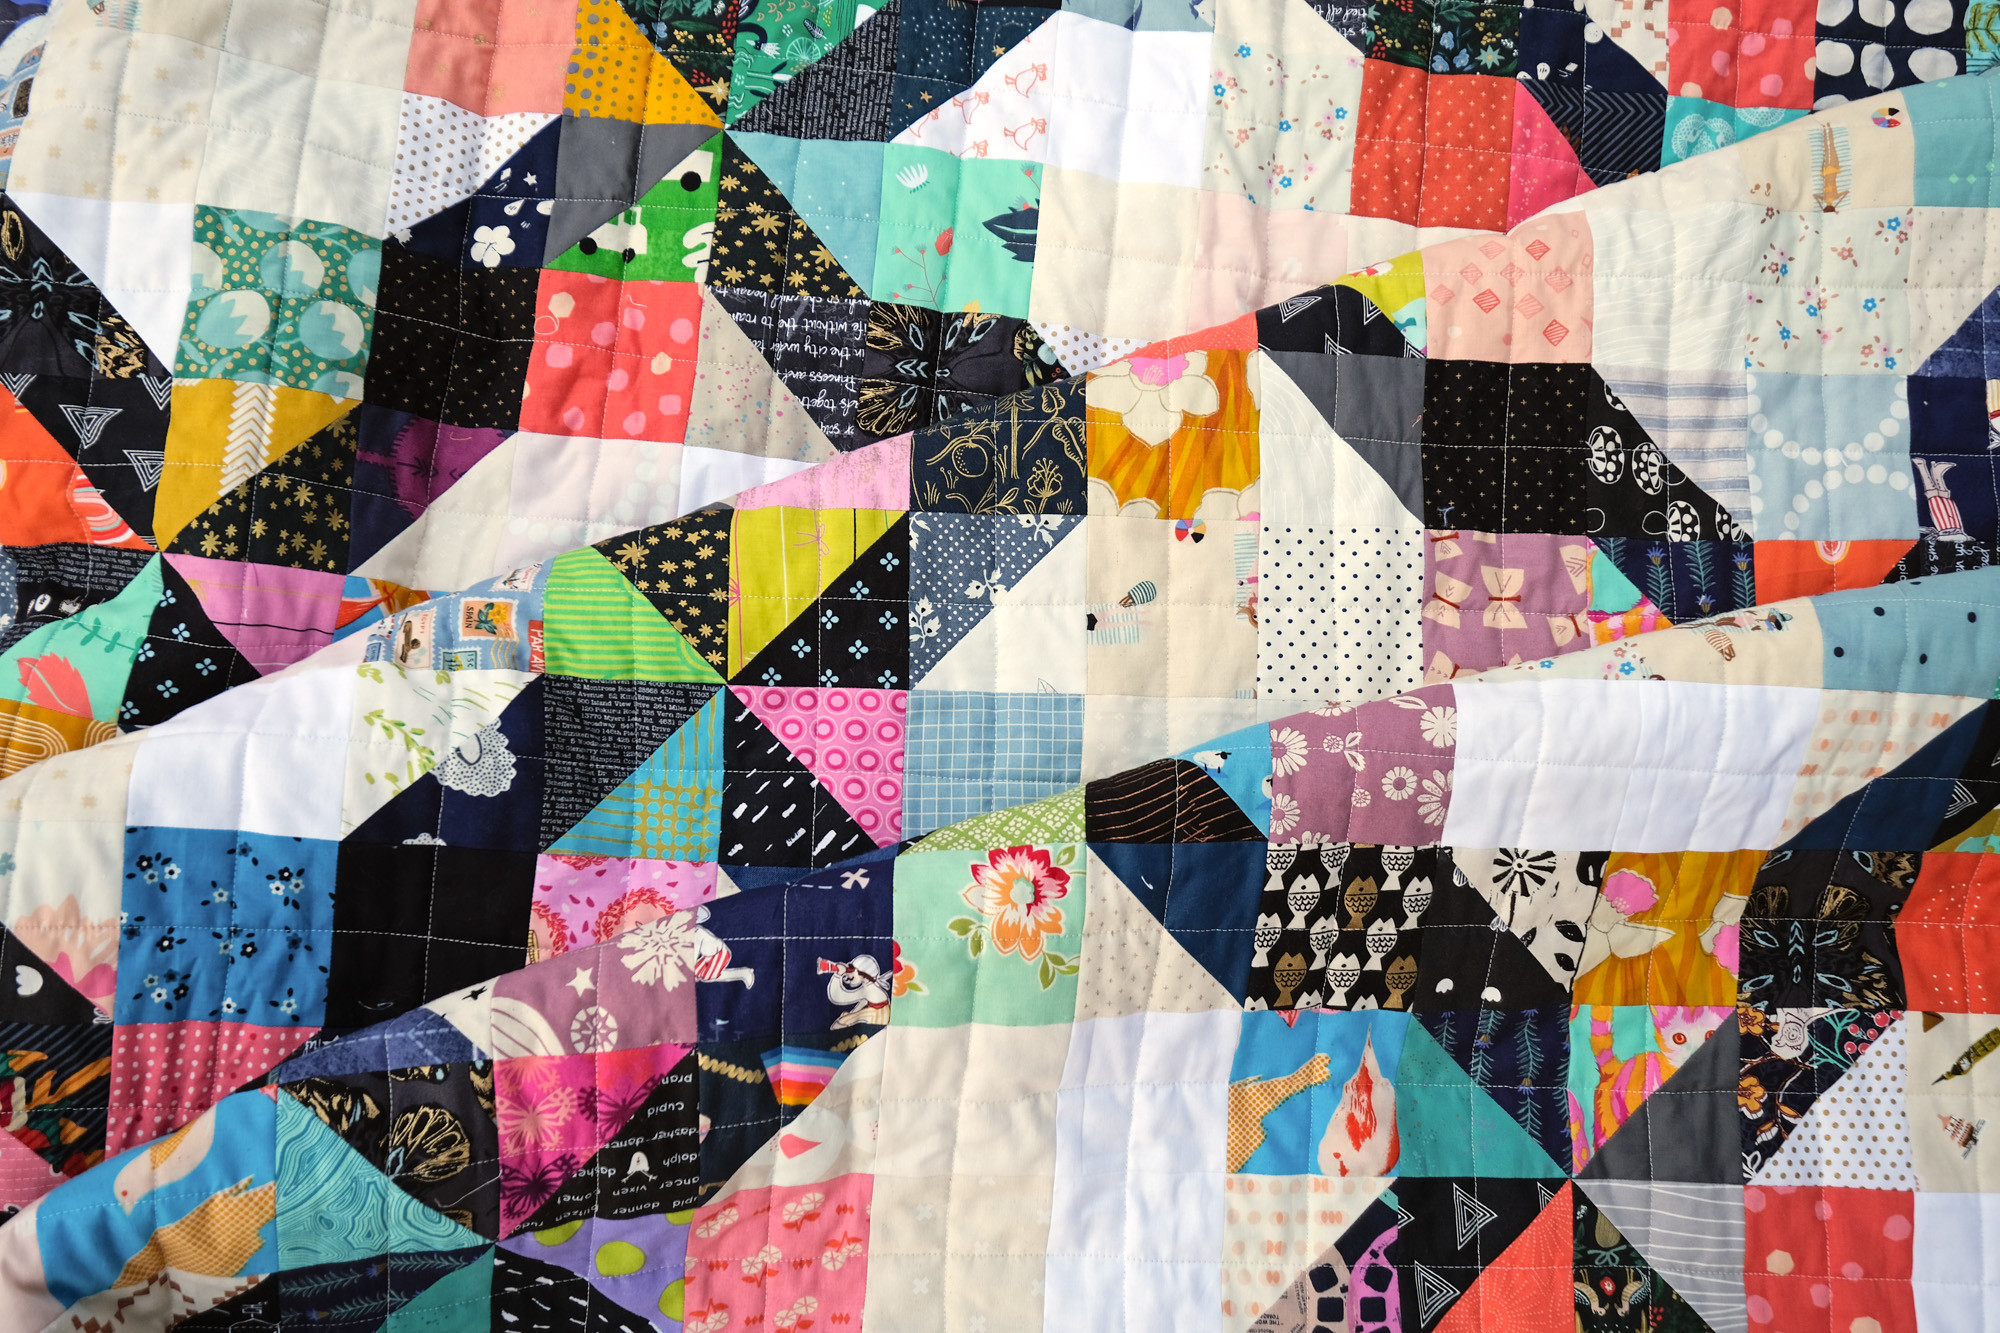
I mostly stuck with black or dark blue for the darker valued scraps since I happened to have quite a few of them in my bin and then tried to use brighter colors for the B fabrics. As always, using scraps was more important than getting everything exactly perfect so there are a few places that probably could have used some tweaking.
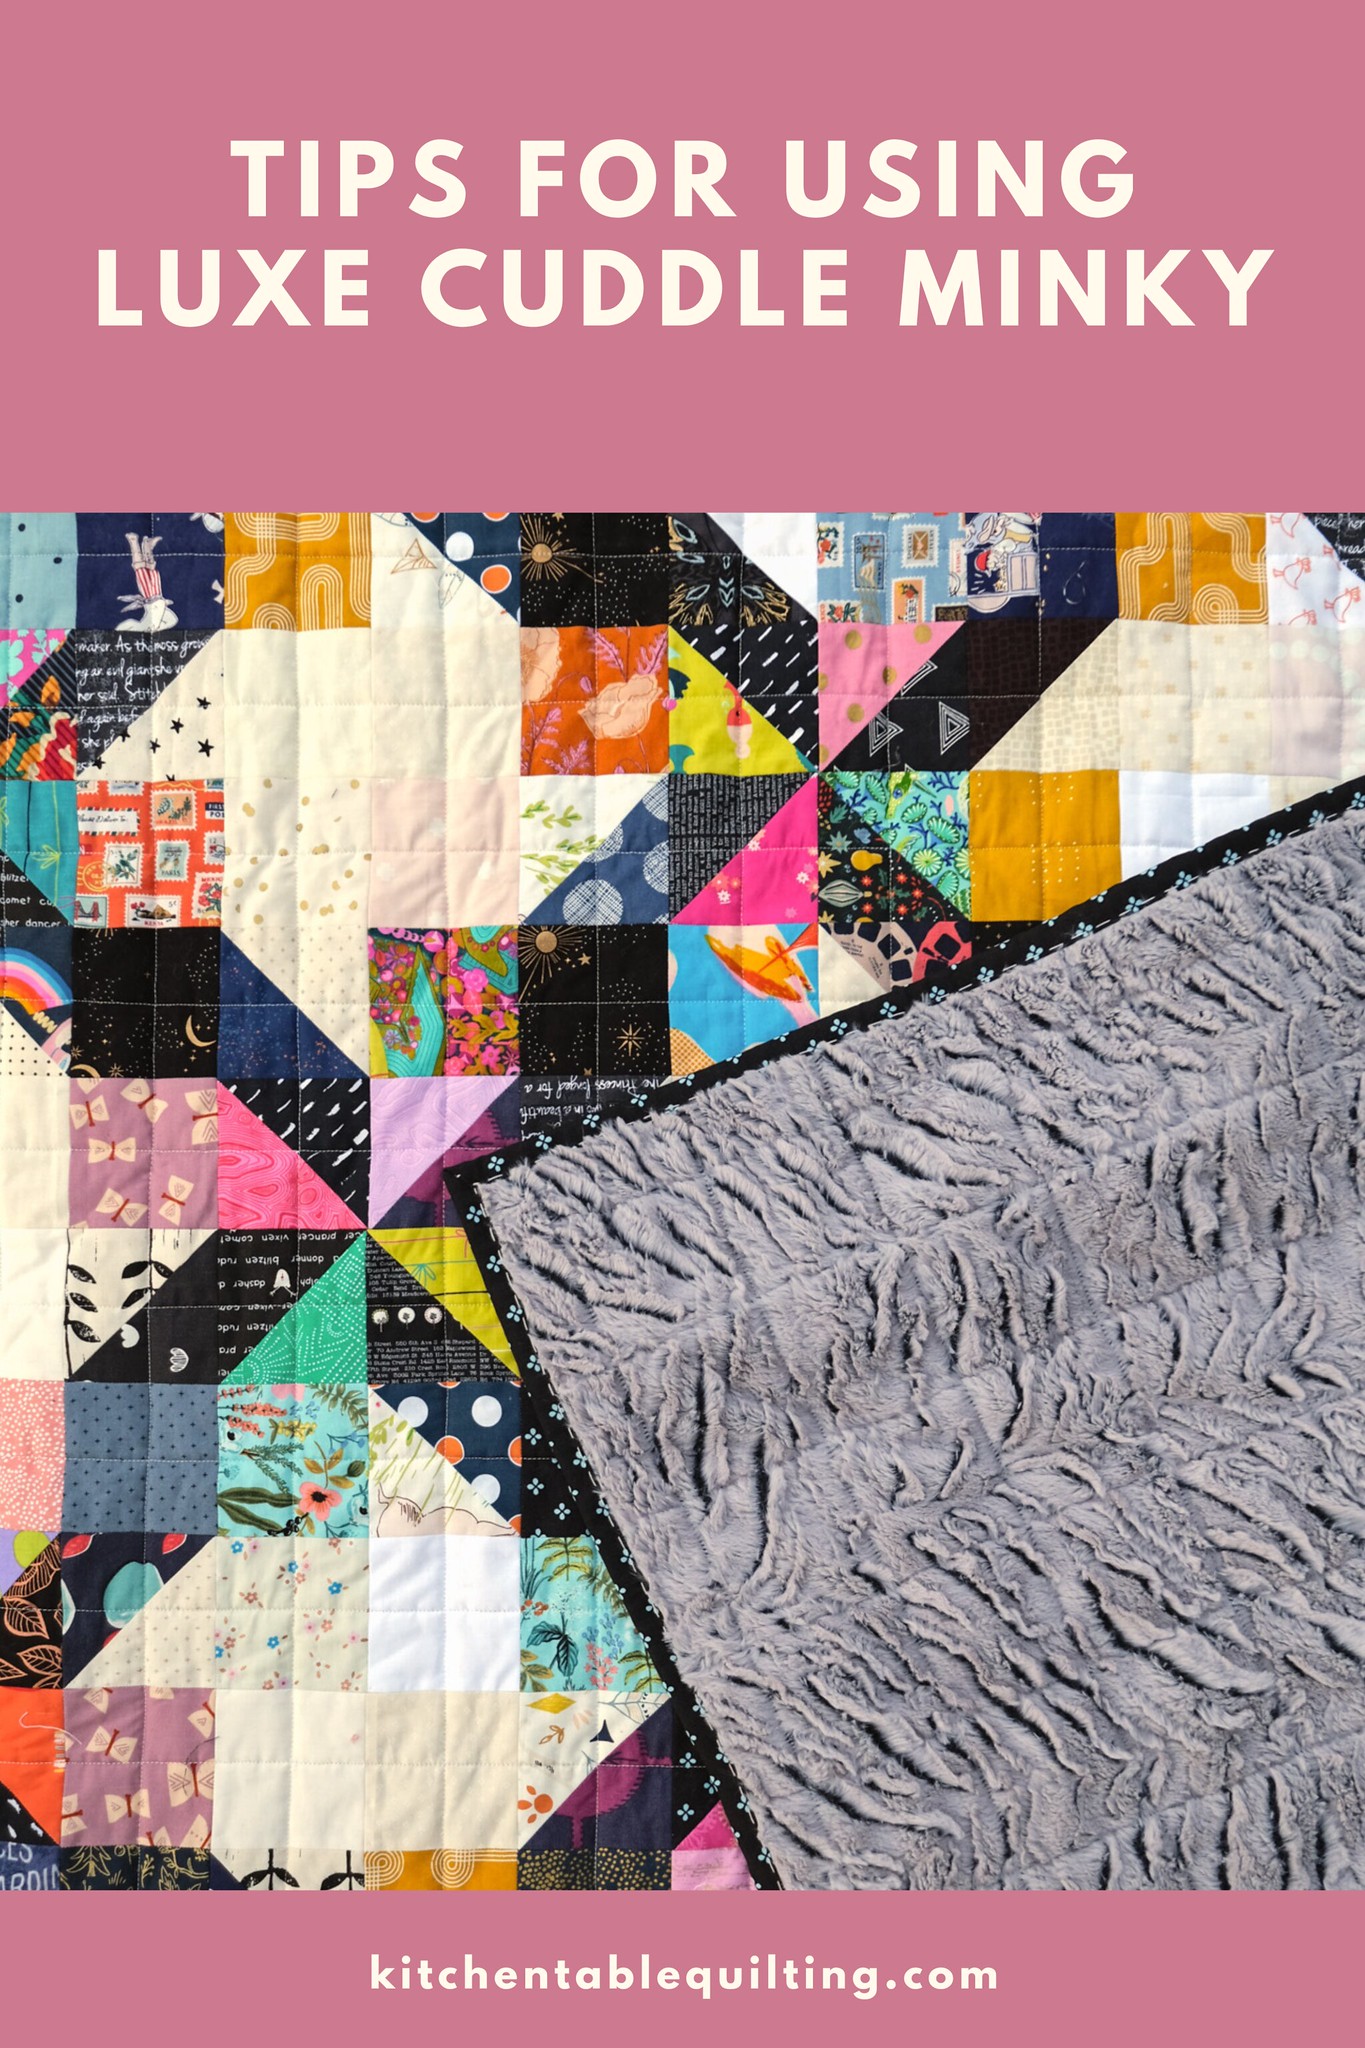
For the backing fabric, I decided to use a Luxe Cuddle (it's this Frosted Zebra in Gray) that I had picked up a while back. It is SO SOFT. I know that sometimes using minky can be a little intimidating and luxe minky (which is quite a bit fuzzier) can be even more intimidating, so I though I'd give you some tips while the process is still fresh on my mind. These are the steps that I personally use and you may find other methods that work better for you.
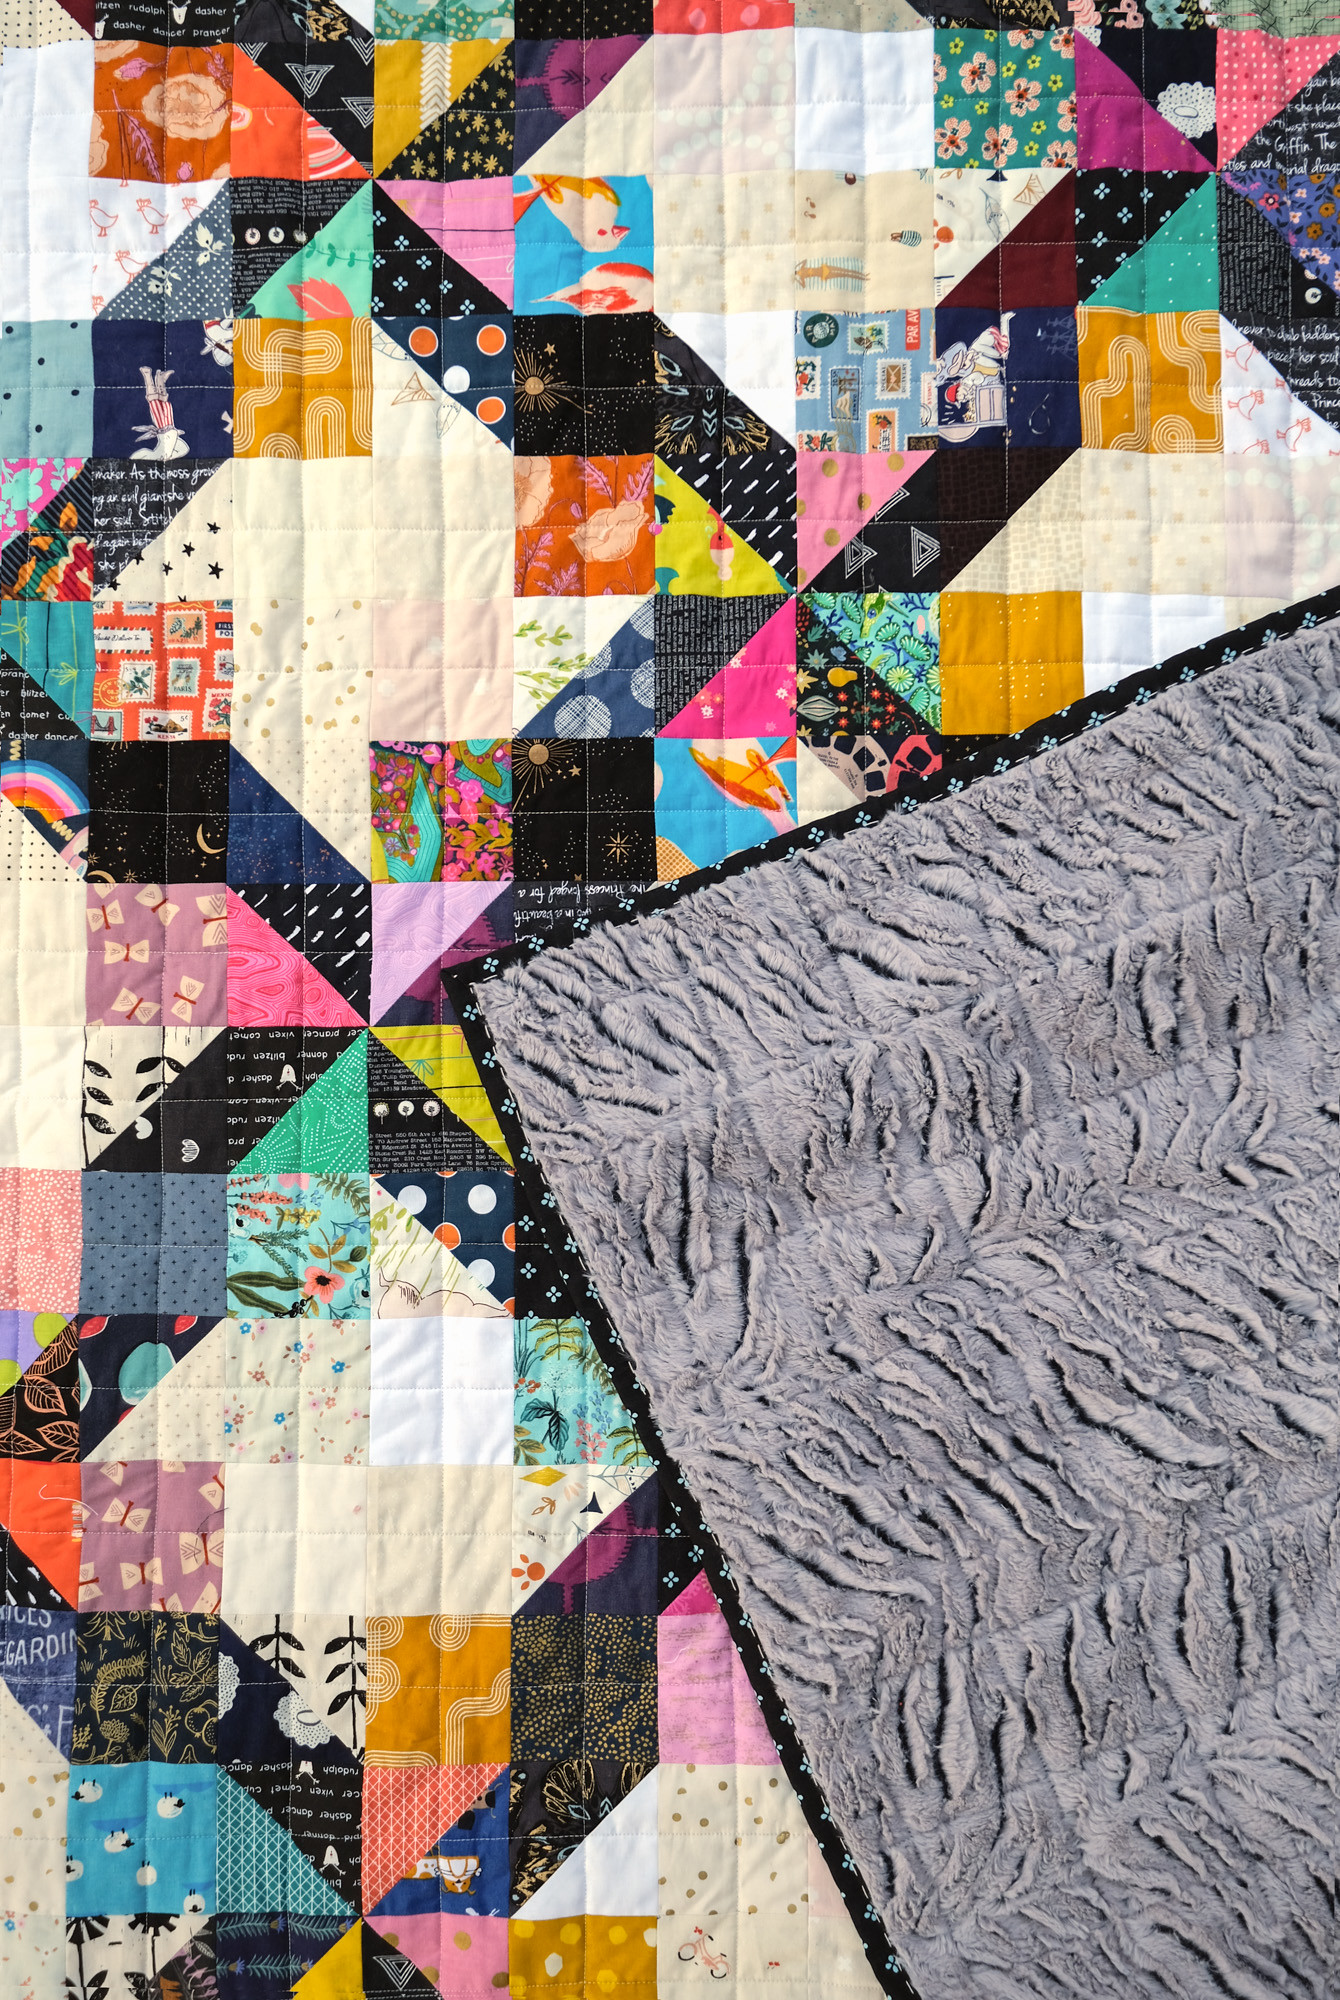
- While you can piece minky, I don't use it in quilts where I need to sew it together because it's kind of a pain. This quilt happened to be a width that was narrow enough to use without piecing the backing (the quilt is 54" wide and the fabric is 60" wide). I used a 2 yard cut of minky for my quilt. If you have a wider quilt, I highly recommend picking up some 90" wide minky to save yourself some trouble.
- This stuff is MESSY. Try to cut it as infrequently as possible. If you do need to cut it, keep a vacuum nearby. I also toss mine in the dryer (on a gentle cycle) for a few minutes before working with it to get rid of some of the extra fluff. For this quilt, I didn't end up cutting my minky until I trimmed my quilt after quilting.
- Do you use batting? Yes, I do because I like a heavy quilt but you do not have to use batting. I use Quilter's Dream Cotton Select which is a low loft cotton.
- How do you baste? I always tape my backing fabric to the floor when basting, but tape does not stick very well to this slippery fabric. My favorite tape is this one because it sticks to almost everything, but it doesn't quite do the job here. The way I get around this is that after I add a piece of tape to the backing fabric, I immediately put a dumbbell (you could also use a heavy book) on top of the tape. This is slightly more annoying than just using tape, but it works pretty well.
- Minky stretches — how do you deal with this when basting? I pull my minky fabric taught without stretching. This isn't as tricky as it sounds. Even though the fabric stretches, you can feel when it starts to stretch so that you know if you have pulled it too much.
- Pin baste? Spray baste? I always pin baste and that is what I do here — I don't use more pins than normal, I just baste like I normally would. While I haven't tried spray baste with minky, I would be a little worried that it wouldn't stick very well.
- Definitely, definitely use a walking foot when quilting with this fabric. It is going to be heavier and thicker than what you are used to putting through your machine. I increase my stitch length a little extra too (normally I use 3.8 and I used 4.2 on this quilt) because the extra weight will make your stitches a little smaller.
- Consider cutting your binding fabric a little wider than you normally do or use a smaller seam allowance when attaching your binding. Your backing fabric has a little more fluff than you are accustomed to and will take up more space in your binding. I normally cut my binding strips 3" wide and then use around a 3/8" seam allowance. I used a smaller seam allowance to make sure that the fluffier binding would fit. Depending on your fabric, try around with a few different options to find what works for you.
- Once you attach your binding, zig-zag stitch around your entire quilt to help keep your minky from shedding and to group your binding, batting, and backing fabric together so they feel a little more cohesive. I actually do this for all of my quilts, but I think it is particularly helpful here.
- After quilting, put that quilt in the dryer for a brief gentle cycle again because there will be fluff.

Mary on
Spray baste works really well on minky, although I use the stuff from the can not the homemade kind
Paula on
Great tips on working with minky/cuddle type fabrics! I’ve worked with regular pile minky several times, and spray-basting works fine. I used 505. And I found it impossible to do a “regular” binding, i.e., sewn by machine to the front, then hand-stitched to the back. When you’re hand-stitching on the back it’s hard to find the fabric backing to catch it in your stitch without going right through to the front of the quilt. I either bound these quits “backwards” by machine sewing to back and then hand-stitching to the front, or I used a wavy/serpentine/3-step zig-zag machine stitch on the front. And I’ve never bothered with batting – I found the loft and weight of the minky was fine. I might add a thin batting if I wanted a really warm quilt in cold climate. Thanks!